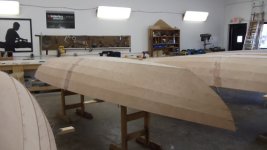
CLC Northeast Dory build (Finishing)

bshillam

Member
Good afternoon to all the Dory fans!

I thought that I would keep everyone in the loop on my finishing work. Maybe this will encourage others to follow with a build of their own. As well, I'll be including pictures from time to time on my progress.

First let me start by stating that this process has been very enjoyable for several reasons, Getting to meet all you fellow builders was fantastic, it was encouraging along the way, helping others to begin their build was also very enjoyable. Having the guidiance of such a patient teacher was a plus! I have learned several things about building a boat such as this and it has taught me to allow the boat to help me, no it's not going to be perfect, I need to listen to what the boat is telling me, and in the end I'll enjoy it even if there is a slight imperfection. As long as the water stays on the outside while I am dry!

After getting the boat home Saturday I learned finishing this boat in my back yard on the concrete patio under a tree wasn't such a great idea. Plan B....was there a plan B? Ok Bryrick, lets ask our neighbor friend Dan if I can overtake his garage for a few weeks. (Yes a few weeks, as my mother in law is here for another three, I should take advantage of the time and finish this build) Gladly Dan without any hesitation turned over the keys to his garage.

Yesterday I began walking supplies, vacuum, and what not over to his garage as well as tucking the boat into place. Any longer and I wouldn't be able to close the door! The garage wasn't too deep, but I was happy I have working space all the way around the whole boat! Yeah! Did I mention it was dry. (Big smile)

Today after breakfast I decided it was time to dig in and begin with some epoxy work. Mixing the first batch, David Fawley in the background of my mind, "remember one pump per side. Don't think you can pump ten and then move to the hardner." Boy this is slow, I'll do it my way. No distractions, no music, just me and the boat. First batch on the boat, no problem. Filling in the gaps on the lapstrake. Second batch, no problems (or I thought). Third batch, did I remember to stir for two minutes on that last batch? I didn't on this and just had to pour it out....Mistake one. Pour out the third batch of epoxy in the garbage. Fourth batch, mix - add cello. No other mistakes. I'll look forward to returning this evening to put my first full coat of epoxy.
 
bshillam - Please fill in with some more explanation on your project. Finishing a boat? Fellow builders? You are mixing epoxy? You're building a dinghy? Small enough for your neighbor's garage? I'm curious, Thanks.
 
A beautiful boat! Chesapeake Light makes some wonderful designs. I've noted they offer classes in Port Townsend and have wondered about that experience. Is that where you went? I'm looking forward to seeing your pictures once you've completed it. Quite an accomplishment...

So how feasible would it be to trailer up there, do some cruising, and also attend one of their classes? No doubt one glitch could be the type of boat to be made and whether or not it could be brought home at the same time.

Rob
 
I attended in Annapolis where the company is located. This particular boat weighsover 100 lbs so putting on top of a CD would be difficult. However,not impossible. Should you take one of their courses feel free to touch base and I'll give you my two pennies. They serve the small sailer fans well, but the only have a few power boats. There is interest though at clc to start carrying more power boats. They have a new skiff I am interest in building after this one. About 200 hours to build but a great little package. My Northeast is being set up to row and will have a small outboard as well!
 
Last night I went back to check on my epoxy work behind the laps and found in a few spots as the epoxy dried it sunk and or got obsorbed into the surrounding wood. So another batch made and sprend into the low areas. I went back this morning to find most of the work looked good and will just need a little touch up as I prepare to apply the first full coat this morning.
I'll be posting pictures later tonight...time permitting.
 
I'm reinforcing the mast step on a CLC Skerry, or trying to as little time is available. This winter the dagger board, kick up rudder and spars will be built also.
If there was a practical way to carry it on our 22 cruiser I'd love to but I don't see a way. Towing it at over 6 knots is asking for trouble, i suspect.
 
It's been a busy couple days. Yesterday I put two coats of epoxy on. One in the morning and one late into the evening. Well today I headed out to do some serious sanding and noticed there were a few low spots that needed some touching up. I also took stock of the remaining epoxy and thought - I might just run out before this build is done. About half of the resin is already used and I haven't flipped the boat over. I guess I should start really watching the waste. Over the last few batches I have been very careful and made smaller batches to eliminate waste. So the low spots are filled and I will be tackling the sanding tonight on the outside of the hull. Oh - I didn't realize the mixed epoxy on the rail needs to be sanded off as it had silica in it and it doesn't look pretty under the clear epoxy. Make sure to sand the rail clean prior and this will save you sometime...

I also set up an account on flicker(sp?) to share the build with everyone.
http://www.flickr.com/photos/88046876@N03/
 
Well today was the most amount of time I spent on the Northeastern Dory yet. I just picked up the Dewalt compact router for the rails and seats. It's my understanding that you can do all of them with a block plane and sand paper but I don't have that kind of time. Dewalt dpw611. I was impressed with this little guy and 1/2" round over bit was perfect for the bottom of the rail, in addition a smaller compact router is needed as the hull is too close to the rail so a full size router won't work here. It made very quick work and nicely rounded out the rail!! I can't wait to do the top side and seats. I've never used a router and the amount of material, wood shaving and epoxy that was flying was awesome.
So I spent the day sanding and boy my arms feel like it. That 6" sander needs a brother quckly. After starting with 80 and then switching to 220 (I didn't have any 120 on hand) I smoothed the hull to the dullish gray. I did thin the epoxy along a few of the boards facing the bottom of the boat. Just to ensure they were not open to water I decided to epoxy them lightly and then my brush continued with another third coat. I'll go back one more time with 220 just to rough up the surface preparing for primer. I am hopeful this will go on Monday/Tuesday.
 
Looks like you're having fun and doing a nice job. I am a bit surprised that CLC didn't have your class stagger the scarf joints. Maybe that's because you have frames, but when I built my Iain Oughtred "Wee Rob" (no frames), he stressed that the scarfs be staggered for strength purposes.

8053776833_fa8bb6f41e.jpg
 
It's a kit and they come pre cut with the scarfs in those locations. I'm not concerned, wouldn't know why he would have said that. The bond between epoxy and wood is typically stronger than the surrounding material. If it is going to fail it would be outside of that bond. As well being it's a lapstrake design there is a significant amount of epoxy/cello mix behind the lapstrakes. Probably nearly a third of a gallon along both sides!
 
The last few days has been very busy.
Yesterday I spent a fair amount of time in the sanding zone. Sanded all the seats with 120 then 220? I started on the hull with 120 then finished with 220. I only got half the hull done and returned today to finish. Mission accomplished! Smooth, I am looking forward to primer in the next few days with paint to follow!!!!!
I also rounded out the rails, sanded, shaped them. I quit just has I almost caught the sandpaper on fire because I was using only the center of the pad (I know better, must be tired). That wasn't on the new sander - that would have fired me up.
Tomorrow I'll be working on cleaning up the inside, mounting the seat supports, and putting on a coat of epoxy. If I stay on track should have a completed, water worthy vessel by mid next week! :thup :thup
 
Beautiful boat! Is there a very thin layer of glass on the bottom? I would recommend at least 3 oz cloth to protect the bottom from rocks and sand etc. The 3 oz cloth has miminal if any print thru with epoxy, and will really increase the life of the boat--with minimal weight.

I owned a Gloucester Gull for a few years--used to row it 6 miles every morning in Huntington Harbor for exercise. Put a big American Flag on the Stern and rowed the wife and kids around on Sundays, if I was not racing the sailboats. Your boat is going to be more stable and a little lighter than the Gloucester. It should row and sail very well.
 
6oz on the bottom and first lapstrake, three coats of epoxy on the entire hull exterior, fiberglass same location interior and will have two t three coats of epoxy depending. In addition add primer and three coats paint as well five coats varnish. By using 6oz three coats filled in the weave but did add some weight. By the time it's all said the will be about three gallons total.
 
Great on the 6 oz cloth--it is better and cheaper--a slight amore more weight. On the interior, I might leave some of the weave showing for non skid. There an many other options if you desire non skid.
 
Today was a bit day again on the Northeast Dory build. Last night I applied the first coat of epoxy to the hull. Today I returned to apply another more generous layer. Did some clean up work with the hull prior to application. In addition I had some cutouts for the seats that wrap around the bulkheads. These were originally cut using a band saw. Well the saw had quite a bit of walk and I could have used a fence during cutting. Well needless to say the cut outs weren't to my satisfaction so today another trip to my favorite tool guy, a router bit and I fashioned up a jig on the seat, cut and then used a 1/4" round over a quick sanding - much better! Looks straight and nicely rounded. Custom seat post too yesterday. Ready tomorrow for the big sand on the inside and it will be ready for primer, paint and varnish. Should have the boat ready for the water by weeks end!
 
Well, it's been a few days and I haven't posted. That's because I've been sanding, and sandinf, and sanding. In fact, I bought a second sander just so the wife could help, she pitched in for a few hours. Hey, whatever can speed the process up. I am after all borrowing my friends garage to finish the boat. There are a few areas I am not happy with, but my hands won't take it anymore and I'll come back with another sander in my own garage later. The main thing is that the majority is coming along very nicely. I certainly have learned a few things about epoxy on this build and sanding too. If I am going to do this to make a few dollars a few more sanders are in order!

Tomorrow I am going to begin varishing, five coats wish me luck!
 
Hi all,

I had the opportunity to drop in and check out the CLC dory and Sweet Pea (CD 22 for sale) today. Nice work on the CLC and the 22 is in fine shape as well. Waiting for our Monk 36 sale to finalize and we would love to bring Sweet Pea over to our place.
 
Back
Top