Repair log - wet transom core

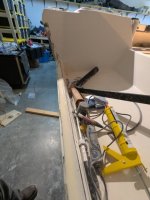
Work is progressing. I'm removing balsa core via the open top of the transom, and while its tedious it's not impossible. The advice on a spade bit was good; that's been a helpful tool. A few DIY pry-bar/chisel tools have also been helpful.

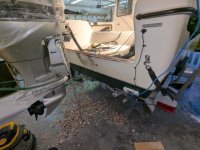
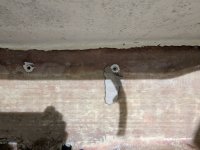
The sole setback; I managed in a couple of cases to punch through the inner transom skin below the splashwell with the spade bit. The skin here is surprisingly thin - I'd estimate 2-3mm - and therefore more delicate than I'd anticipated.
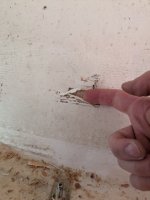
PXL_20250518_042001115.sized.jpg

I'm forming a plan for recoring, based on my forecast abilities and accessible materials. I'm looking to remove all transom core, and replace with CarbonBond pourable transom compound (formerly NidaBond).

A discussion with one of their techs suggested that moderate prep of the transom skins would lead to a solid bond between CarbonBond and transom fiberglass (recommended sand and wash with alcohol, with a few remaining balsa fibers acceptable). The tech didn't have undue concern about the meeting of CarbonBond and any damp balsa 'around the corner' at the transom/hull junction, other than it would be unlikely to make a solid bond to that balsa.

Given I've already put a couple of (admittedly small) holes in the inner transom skin, I'm considering going a step farther, and removing the majority of the inner skin, leaving a ~2" margin around the edges for ease of replacement. This would allow easier access to remove the remaining balsa, and give that otherwise-inaccessible lower transom area a better sand/clean prep for CarbonBond adhesion. I'd either replace the skin with a new panel before pouring, or make a temporary dam to seal the gap where the panel was removed, pour CarbonBond within the temporarily sealed transom, then apply fiberglass on the cured CarbonBond surface once I'd removed the dam. I'd need a bit more thought before landing on how exactly to pull this off - it's certainly the more involved option (for my level of fiberglass experience).
 
Donald - before doing any digging, I'd think about Clay's advice: consider what you can legitimately defer until after this boating season is complete (keeping in mind your own appetite for risk tolerance). My transom core did need replacing, but I suspect I would have been fine for another season if I hadn't dug into it so comprehensively already.
 
When we beefed up the (non bad core) transom on the 2003 25 I felt it was prudent to put a couple of more layers of epoxy resin and 1708 on the inner surface of the transom, and spread it out over the splash well and to the corners of the transom inside.
 
I did a transom on a classic with Carbon Core. The work is the prep, cleaning the old core. I added a couple layers of glass to the outer skin, this served two functions, added a bit of strength but mainly wanted to fill all the holes 😀. You can view some photos under the Hunky Dory album.
 
I'm an amateur but am resilient and mostly successful with my projects largely because I ask too many questions or read too much ahead of time. Groups like this are very enabling and accountable. We're blessed. 35 years ago there wasn't yet a reliable internet but Don Casey and many, many others wrote books that even I could understand and follow. In addition to repairing and replacing all the decking/flooring/fairing on a 28' sailboat I have also repaired others and have built a number of dinghy sized craft for various uses.
I used some System 111 and some West System but most on my 40-50 gallons came from RAKA marine in Ft Pierce FL. They are a smaller business and are careful with your orders. I also used their fillers and tools and fiberglass. Seem to be really good people. www.raka.com. But there are many out there and I'm sure that they all have their good points. Rake an always sold 2" Natural bristle brushes and I liked them a lot. If indeed you are going to repair a transom you'll need tongue depressors, two or three sizes of mixing cups and a smallish electric drill bit thingy for mixing the larger batches.
If I were stuck with replacing the transom core it would likely be done from the outside. My handsome bulbous build would not perform well with an inside repair.

Before doing anything I'd get lots of advice, filter that advice and compare it to what you find on forums and internet sources.

When ready, if it were me, with my bad back and all, I'd remove all the engines and gear and jack the boat up to mid-thigh hight so that the top is a hair less than shoulder high. Have a couple of various height stools and devise some way to reinforce or clamp as needed. People that have done this exact boat will have the know-how you need.
Cousa will be way better than balsa in my opinion.
 
Do you regret the removal of the center cleat on the foredeck when you installed the anchor. I'd like to know if the chain rubs on the deck and if the deck has shown any wear. May I PM you? Getting ready to instal the new lodestar drum winch on my 22.

Reelin2":2ehp9tz4 said:
I did a transom on a classic with Carbon Core. The work is the prep, cleaning the old core. I added a couple layers of glass to the outer skin, this served two functions, added a bit of strength but mainly wanted to fill all the holes 😀. You can view some photos under the Hunky Dory album.
 
Considerable onward progress over the past week or so.

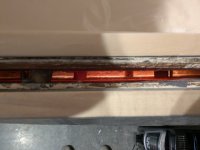
I removed all of the balsa core in the transom, all the way down to the hull. This was pretty tedious. I completed most removal with a 1" spade bit on extensions, busting up balsa into bits that could be removed with a shopvac. As I got closer to the bottom, I modified the spade bit by grinding off the central threaded point, so as not to bore through the fiberglass. From there, I removed the rest with a piece of metal pipe that I'd fashioned a little 90-degree sharpened prong into the end of - I could use this to hook under remaining balsa chunks (whacking it with a rubber mallet to gain purchase) then pulling upward to free them from the fiberglass. Finally, I removed the remaining morsels at the very bottom and edges of the cored area with a wire brush on drill extensions.

Once all the balsa was removed, I went over both skins thoroughly with an aggressive 1" flap wheel, and thoroughly wiped down with acetone (rag-on-stick method).

PXL_20250514_162809813_1.sized.jpg
 
Removing the core made apparent how thin the inner fiberglass skin below the splashwell really was. Much of it appeared to be 1-2 thin layers of glass, with gelcoat/paint forming the majority of its thickness. Not a surprise that I'd made a few holes with the spade bit. Grinding away the gelcoat/paint, it took careful work not to wear more holes in the underlying fiberglass layer.

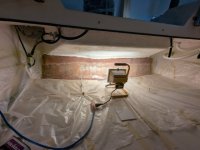
Seeing this, and keeping Dr. Bob's advice in mind on reinforcing this area, I chose to add a couple layers of fiberglass to this whole surface, using epoxy. The thin expanse extended down to the floor, so I tabbed down onto that. An area of thicker glass extended down ~6" from the top of the area under the splashwell (visible in the second photo below). I overlapped that area by ~5".

Two layers of woven glass mat, and three subsequent coats of neat epoxy.

PXL_20250604_001052526.sized.jpg
PXL_20250604_032954601.sized.jpg
 
Inner transom skin dealt with, it was time to prep for replacing the removed balsa core with CarbonBond.

This job was 95% preparation. Pouring was going to be easy, but also non-replicable - very important to get everything right before actually doing it.

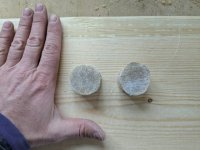
My first step began concurrently with re-glassing the inner transom. I'd take the remnant epoxy from each application cycle, mix it with wood dust and pour it into toilet paper roll molds. From the resultant cylinders of hardened epoxy, I cut a series of 1" thick pucks, to use as spacers within the transom void to maintain the same uniform 1" thickness the balsa core had. I puzzled over how to keep them in place while I applied clamping pressure from the outside, and in the end drilled a hole through each one and strung them on a loop of fishing line. I used this to dangle them down within the void to where I wanted them, and then taped off the loop of line to keep them in place. Once I had external clamping pressure holding them in place, I could snip the fishing line and pull it out.

Epoxy spacer pucks on strings
PXL_20250607_224905639.sized.jpg

Spacer pucks dangled in place
PXL_20250608_162759393.sized.jpg
 
Next, I redrilled the bolt holes for the main outboard and kicker bracket in the new inner transom skin.

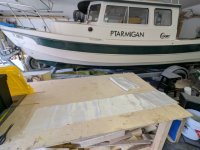
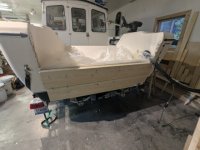
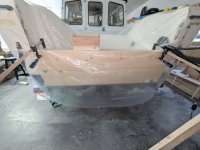
I made up some jigs to clamp the transom to uniform thickness from the outside (bearing against the 1" spacer pucks). Two 2x10 planks on the outer transom, one 2x10 inside below the splashwell, and 1 2x4 inside above the splashwell. I used the outboard and kicker bracket bolt holes to fix the planks in place, using bolts I'd warmed up and applied a layer of candle wax to (to enable their removal later once the CarbonBond had set up).

The bolts I used were smaller diameter than the holes - to prevent CarbonBond from leaking, I applied a ring of 4200 around each bolt hole before clamping down the planks.

PXL_20250609_055216347.sized.jpg
PXL_20250608_013621812.sized.jpg

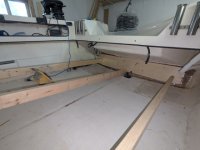
I added compressing force to the bottom of the lower inside plank with 2x4s bearing against a 2x10 abutting the cabin wall.

PXL_20250608_013645711.sized.jpg

Last step was to fabricate a funnel to ensure easy pouring, with some stops allowing it to sit in place hands-free.

PXL_20250608_013559723.sized.jpg
PXL_20250608_013548742.sized.jpg
 
Cool and easy Idea for a funnel. I won't elaborate on a few I made as it was a long time ago and they worked terribly bad.
I'm so glad you have documented this whole process well as it will serve so many owners going forward.
 
Nearly all the work being in the prep, pouring the transom compound was relatively straightforward.

There was just one hiccup - on opening the box I discovered that while the supplier reseller (not CarbonCore) had helpfully included MEKP catalyst, it was only enough to catalyze at a temperature substantially warmer than my shop. Cue multi-pronged heating efforts (of the shop as a whole, the transom, and the bucket of CarbonBond) to reach the temperature for which I had enough MEKP...

On reaching appropriate temperature, I enlisted an assistant, and with everything ready mixed the transom compound and catalyst with a heavy-duty drill and mixing paddle. Once thoroughly mixed, we carefully poured the compound into the transom void. We poured a small amount at a time, and moved the funnel along the transom top to ensure a uniform level of compound as we went. The liquid compound is relatively thick - imagine melted ice cream mixed with sand. It does self-level to some degree, but it would have been quite slow to wait for it to do so if we'd only poured from the centre.

Carefully pouring while managing the funnel is very much a two-person job.

PXL_20250608_215140310.jpg

I had calculated a transom core volume of 5.19 gallons, but bought only one 5-gallon bucket of compound. For the eye-watering price in these parts, I was satisfied making up the 0.19 gallons of remaining space with a combination of the epoxy spacer pucks, and thickened epoxy transom cap. With the epoxy pucks in place, I ended up with perhaps 3/4" of remaining space to fill.

Speaking of eye-watering, I should mention to anyone considering using CarbonBond; ensure you have adequate ventilation. This stuff smells acutely toxic.

CarbonBond suggests it cures to workable condition within 2 hours, but to keep on the safe side I left all to its own devices for ~12 hours. Checking hardness, I found I could mark the 12-hour cured compound with a screwdriver, but only by applying considerable force.

PXL_20250609_160745094.jpg

I removed the wooden jigs, and spotted one near-disaster: my 4200 containment ring around one of the bolt holes had very lightly failed, leaving a small blurt of now-hardened compound on the inside transom. A larger failure than this could have been a catastrophic leak of curing transom compound into the cockpit. Crisis narrowly averted.

PXL_20250609_173231415.jpg
 
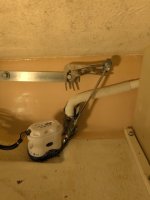
My final remaining jobs were to build up a transom cap, paint the new inner cockpit skin, and reattach all the hardware I'd removed (i.e. main motor, kicker bracket and transducer cable fasteners, fuel tanks, bilge pump and fuel-water separator).

I filled the remaining 3/4" transom void with cabosil-thickened West System epoxy, a little at a time to avoid thermal disaster. With a looming trip departure (did I mention I completed all of this with a countdown over my head?) I elected to simply finish with a faired epoxy surface, and re-application of my original (now broken) plastic transom cap with LifeSeal adhesive. The final product is functional but not elegant - I'll revisit this when I have more project time at my disposal this winter.

PXL_20250612_025430851.sized.jpg

My approach to finishing the interior skin of the cockpit side was similarly responsive to my remaining available time. I applied two coats of an alkyd rust paint, which will do for now.

With the main motor off, I figured this was a good opportunity to add aluminum bars between motor bracket bolts on the cockpit side, rather than rely simply on the original washers to bear the outboard weight. I fabricated these from scrap bar from a local metal shop.

Having lost access to my assistant, I had to implement a solo system for remounting the main motor that some of you may recognize from your own similar experiences.

PXL_20250612_062949302.sized.jpg
 
Everything reassembled and cleaned up, it was time for a test run. I'd performed some concurrent repairs on the Honda BF90A3 main motor (replacing a corroded tilt tube, and installing new oil seals on the upper end of the gearcase) which needed assessment as well.

Everything worked as it should; the motor motored, and the transom transomed. Externally a pretty anticlimactic result, but at least I (and now some of you) know what went into regaining normal function.

PXL_20250613_044728469.sized.jpg
 
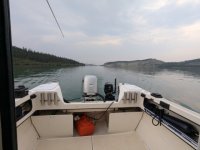
A lot of work (much of it late nights that would have otherwise been occupied by sleep), but immediately rewarding in that it enabled our planned mid-June SE AK family trip to run as planned.

PXL_20250618_003814299_1.sized.jpg
PXL_20250616_202520810_1.sized.jpg
PXL_20250619_181827537_1.sized.jpg
PXL_20250618_183236509.sized.jpg
PXL_20250620_161510605.sized.jpg
PXL_20250621_231607407.sized.jpg
 
We planned to pour slowly in stages, to allow each slug of compound to settle and spread, and to avoid trapping any air bubbles under a thick layer of compound. However, the consistency of the compound as we poured it provided me with good confidence that there would not be issues with trapped air - the compound 'slid' over itself while spreading in a way that did not look conducive to trapping air.

I should note that before pouring, I had a useful pep talk from Reelin2, who had used CarbonBond on his C-Dory previously. Among my concerns he addressed was the possibility of air pockets.
 
Glad to see you’ve got this repair behind you now. Seems like you made pretty short work of an extensive repair. Looks like you had a great trip. I’m sure the upcoming trip provided good motivation to get the job done!
 
Back
Top