
Search results
-

Getting Fuel Tank Tested
It's a good question! Probably the most direct, easy to understand reasoning is that this support spacing is (as Pat points out) no worse than what the tank (and likely all 100 gallon aluminum tanks in 25's) have. That is, a couple of rubber strips spaced about 24 inches apart. Here, not only...- LuckeCatanias
- Post #41
- Forum: Fuel Systems
-
Getting Fuel Tank Tested
Micarta attached. 5200. 0.125 phenolic.- LuckeCatanias
- Post #38
- Forum: Fuel Systems
-
Getting Fuel Tank Tested
The fabricator actually recommends against doing any kind of coating. Not sure of their exact logic -- the guy on the phone from the fabricator I asked said something about trapped water accelerating corrosion which I would have to agree with...if it were to happen. Where I don't agree is...- LuckeCatanias
- Post #36
- Forum: Fuel Systems
-
Getting Fuel Tank Tested
Gflex on! Gflex 655, on the bottom and sides. Using the thickened version was okay. I wouldn’t necessarily recommend it over 650. Prep was 60 grit and some wire brushing for the nooks and crannies followed by an acetone wash then etch wash.- LuckeCatanias
- Post #34
- Forum: Fuel Systems
-
Getting Fuel Tank Tested
Gelcoat to tidy it up. I figure it’s good practice to do so also if in the future we suspect a crack anywhere along this area that the gelcoat may make it easier to visually detect. That might be BS, idk. 🤷- LuckeCatanias
- Post #33
- Forum: Fuel Systems
-
Getting Fuel Tank Tested
Wetted out! Laying down the plies with a precise/even amount of step over was really hard, especially the mat. Probably something like 2 liters of epoxy total. The mat and triax were super thirsty. Getting everything to lay in the outboard lower corners was challenging but I got it in the...- LuckeCatanias
- Post #32
- Forum: Fuel Systems
-
Getting Fuel Tank Tested
Thanks Pat! To protect the exterior of the tank from corrosion I'll be applying GFlex 655 to the bottom and sides of the tank per manufacturer specs. I'm not going to go with a dry bilge system like others have done. I'm an aerospace engineer by profession -- we coat our aluminum aircraft fuel...- LuckeCatanias
- Post #31
- Forum: Fuel Systems
-
Getting Fuel Tank Tested
Here are my plies cut and stacked.- LuckeCatanias
- Post #28
- Forum: Fuel Systems
-
Getting Fuel Tank Tested
Fillet in. 5:1 traditional with fumed silica to a stiff consistency like cold peanut butter. 1’’ radius.- LuckeCatanias
- Post #27
- Forum: Fuel Systems
-
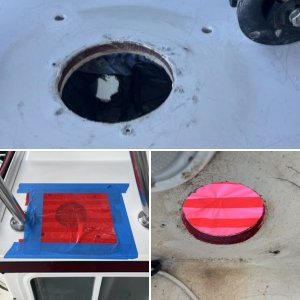
Projects 2025
Project documentation for Pearl- LuckeCatanias
- Album
- Comments: 0
- Category: Our C-Dory Albums
-
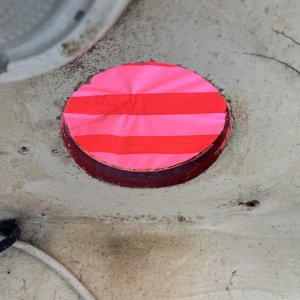
IMG_1692.jpeg
Routered out balsa at the vent penetration and filled with Total Boat structural filler.- LuckeCatanias
- Media item
- Comments: 0
- Album: Projects 2025
- Category: Our C-Dory Albums
-
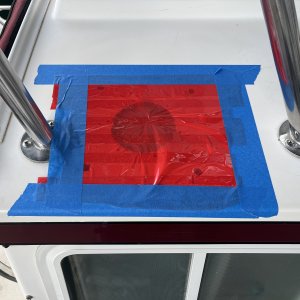
IMG_1691.jpeg
Filler curing with protective masking.- LuckeCatanias
- Media item
- Comments: 0
- Album: Projects 2025
- Category: Our C-Dory Albums
-
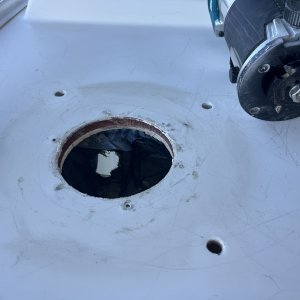
IMG_1690.jpeg
With old vent removed. Over drilling old fastener holes. Coming back with penetrating epoxy followed by potting with structural putty.- LuckeCatanias
- Media item
- Comments: 0
- Album: Projects 2025
- Category: Our C-Dory Albums
-
Getting Fuel Tank Tested
No - I think you’re reading the ply map backward? First layer, directly against the Coosa, is mat. Cut to the same profile as the Coosa. Then: 6 oz bi 23 tri 6 bi 23 tri Are you saying that you'd start with your largest piece being the mat? I could see that making sense if you think that...- LuckeCatanias
- Post #24
- Forum: Fuel Systems
-
Getting Fuel Tank Tested
Coosa just epoxied in. The sticks are wedged in from the aft battery compartment divider to provide clamp up.- LuckeCatanias
- Post #22
- Forum: Fuel Systems
-
Getting Fuel Tank Tested
I 3D modeled the tank to think about how to do my spacers for the bottom of the tank. I think my solution will be to reinforced epoxy in a series of hdpe rails to the bottom of the hull. I’ll rip 1/2 inch thick 1 inch wide strips with a 1/8 inch groove cut into the the periphery of the 1/2 inch...- LuckeCatanias
- Post #21
- Forum: Fuel Systems
-
Getting Fuel Tank Tested
Glass ply map. Base is lightweight mat to get flush to existing surface followed by alternating layers of biaxial and triaxial with 1/2 inch stepovers. I think I’ll overcoat the periphery of the finished layup with a good coating of gflex to guard against any disbond cracking/water intrusion?- LuckeCatanias
- Post #20
- Forum: Fuel Systems
-
-
Getting Fuel Tank Tested
Pattern for COOSA core replacement. Made by cutting the largest rectangle of ply that can fit in the cutout then using a hot glue gun to place tabs that follow the contours of the cutout. This pattern then gets placed on the coosa stock and the tabs are sort of « connect the dots » to define to...- LuckeCatanias
- Post #17
- Forum: Fuel Systems
-
Getting Fuel Tank Tested
Sanding prep to remove the thick layer of Gelcoat at the aft cabin bulkhead.- LuckeCatanias
- Post #16
- Forum: Fuel Systems