Getting Fuel Tank Tested

I 3D modeled the tank to think about how to do my spacers for the bottom of the tank.

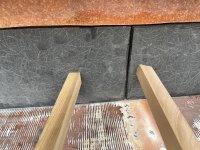
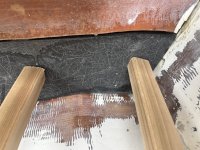
I think my solution will be to reinforced epoxy in a series of hdpe rails to the bottom of the hull. I’ll rip 1/2 inch thick 1 inch wide strips with a 1/8 inch groove cut into the the periphery of the 1/2 inch to act as a keyed feature to mechanically secure the hdpe to the hull.

Then on the tank itself I’ll bond a matrix of micarta washers to act as a wear surface to protect the gflex coating on the tank proper.

Here’s the layout for the micarta.

The limited area of the micarta will limit the any induced stress between the aluminum tank and micarta due to their different thermal expansion rates. I think previously expressed concerns about bonding rails to the tank were around this idea. The micarta won’t be directly contacting the aluminum, just sitting on the gflex.

IMG_1669.jpeg
 
Coosa just epoxied in. The sticks are wedged in from the aft battery compartment divider to provide clamp up.

IMG_1686.jpeg
 

Attachments

  • IMG_1683.jpeg
    IMG_1683.jpeg
    4.1 MB · Views: 2
  • IMG_1685.jpeg
    IMG_1685.jpeg
    2.7 MB · Views: 2
  • IMG_1684.jpeg
    IMG_1684.jpeg
    2.8 MB · Views: 0
This looks as if you are laying the 23 oz triaxiel directonly on the bottom? I would use the same layering on the bulkhead to the bottom. Just one of mat, and 6 oz cloth over the stern facing layer of Coosa.
 
This looks as if you are laying the 23 oz triaxiel directonly on the bottom? I would use the same layering on the bulkhead to the bottom. Just one of mat, and 6 oz cloth over the stern facing layer of Coosa.
No - I think you’re reading the ply map backward?

First layer, directly against the Coosa, is mat. Cut to the same profile as the Coosa.

Then:
6 oz bi
23 tri
6 bi
23 tri

Are you saying that you'd start with your largest piece being the mat?
I could see that making sense if you think that having a base of mat is critical.
 
No I am not reading the ply "map" backwars. Yes, put the mat down first on the bottom. Have you tried bending the 23 oz triaxial over the filett? We used to use 24 oz woven roving, before the bi and tri axials. The heavier rovings do not bend well on a short radius. The strength of the Roving is not really necessary when you have adequate build up of cloth and mat. Theoreticaly you should have the same tabbinf on both side of the bulkhead. Also theoretically the coosa should be floated about 1/4 " off the hull,
we used foam spacers back in the day. thickened epoxy will work. You don't want a "hard spot"--and the load distributed out over several inches on each side. Here the load is more in compression. Think about the mechanics involved.
 
I tried to edit above, but "time ran out"

I should have caught that you were not spacing the Coosa off the bottom and sides to avoid a "hard place". it does not make as much a difference in a cored hull. 'but I aways spaced the bulkhead off the outer skin layers, using a foam spacer.

The below is better to do one side and fill with a polyurethane, and then the other.

Here is a quote from a post in Crusing World by Allied 39:
Depends whether you are looking for "looks good" or is structurally sound.

Largest first gives the largest adhesion area. Anybody who does fiberglassrepairs knows this. Small to largest demonstrates somebody does not know what they are doing.

I do not use foam, foam degrades with movement, obviously. Tab one side with a gap, 3/16 to 1/4. Fill the gap between bulkhead and hull with a polyurethane sealant. If you are in the US (lucky you) the Loctite marinesealant sold at home dopey is about the best priced polyurethane sealant available. Think 3M 5200 without the silly price.

You want polyurethane over polysulphide, preferably.

Then tab the other side after the sealant has cured. Good job done properly which will last.
 
Fillet in. 5:1 traditional with fumed silica to a stiff consistency like cold peanut butter.
1’’ radius.
IMG_1698.jpegIMG_1699.jpegIMG_1700.jpeg
 
Back
Top