thataway
Well-known member
- Joined
- Nov 2, 2003
- Messages
- 21,690
- Reaction score
- 61
- C Dory Year
- 2007
- C Dory Model
- 25 Cruiser
- Hull Identification Number
- DOR25652A707
- Vessel Name
- thataway
There are some tricks to soldering a PL 259 connector, which I want to share with the C Brats.
Tools: Bench or heavy machinist vise, 40 watt pencil type of soldering iron, 6" mill bastard file, knife, good diagonal wire cutters.
PL 259--get a quality connector. You want the coax adaptor sized for the cable you are using. The coax connector should be grass silver plated, and the center pin should be brass, un plated.
Technique. Set the Adaptor in the vise: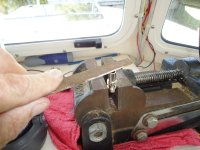
Use the 6" Mill file to remove any plating on the top of the adaptor, and scrape out the center of the adaptor with the file end, and round the outer upper edges of the adaptor.
Then use the file to remove a band of plating around the adaptor where the holes of the main body will line up.
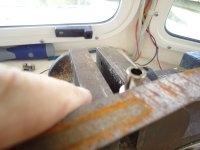
Tin the top of the center adaptor with the 40 watt soldering iron--then put a small band of solder around the adaptor where the holes will line up--the area you filed.
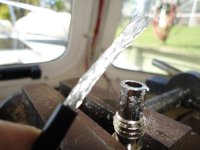
Then put the braid up thru the center of the adaptor, work the braid back down around the top of the adaptor and sweat solder the braid to the top of the adaptor
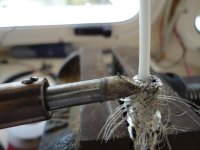
Trim off the excess braid, and clean up the top with the soldering iron to bring a bit of solder down into the body of the adaptor and around where the holes will be.
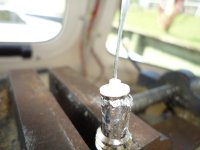
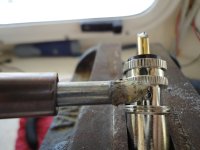
In the above picture a metal washer, and then a teflon washer are put around the 1/4" of inner conductor insulation.
Next the body of the PL 259 is placed over the adaptor, and solder applied to the center conductor, allowing it to wick down the conductor and to the inside of the brass center pin--you do not have to heat the brass center pin until the solder has flowed into it--and then heat only the very top--applying some final solder to seal the end of the center pin.
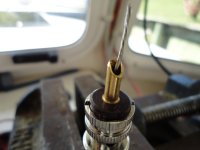
The center conductor is cut flush with the center pin end and any excess solder is filed away if necessary.
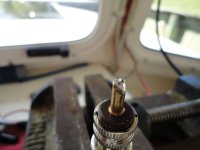
Finally the soldering iron is applied to the holes of the body after it has been screwed down tight on the center adaptor. You don't put solder on the iron or body, but in the hole if necessary
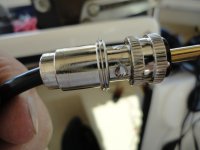
The final result shows that the solder is slightly concave in the body holes, and has flowed well between the body and the adaptor.
OK for those who have hung in so far, here are the differences from the "usual" technique. First we use the vise as a heat sink, the adaptor is clamped in the vise at almost every step, and this helps to avoid heat damage to the insulation of the cable.
Second, we do not pull the braid down over the adaptor, so it is soldered in the holds. This is not necessary, since the braid is soldered at the top of the adaptor, and gives a much better joint.
Third, we use a low heat iron, not a 140 watt gun. This also helps to avoid any damage to insulation.
Fourth, we avoid excess solder on the center pin and on the body of the PL259.
Tools: Bench or heavy machinist vise, 40 watt pencil type of soldering iron, 6" mill bastard file, knife, good diagonal wire cutters.
PL 259--get a quality connector. You want the coax adaptor sized for the cable you are using. The coax connector should be grass silver plated, and the center pin should be brass, un plated.
Technique. Set the Adaptor in the vise:

Use the 6" Mill file to remove any plating on the top of the adaptor, and scrape out the center of the adaptor with the file end, and round the outer upper edges of the adaptor.
Then use the file to remove a band of plating around the adaptor where the holes of the main body will line up.

Tin the top of the center adaptor with the 40 watt soldering iron--then put a small band of solder around the adaptor where the holes will line up--the area you filed.

Then put the braid up thru the center of the adaptor, work the braid back down around the top of the adaptor and sweat solder the braid to the top of the adaptor

Trim off the excess braid, and clean up the top with the soldering iron to bring a bit of solder down into the body of the adaptor and around where the holes will be.

In the above picture a metal washer, and then a teflon washer are put around the 1/4" of inner conductor insulation.
Next the body of the PL 259 is placed over the adaptor, and solder applied to the center conductor, allowing it to wick down the conductor and to the inside of the brass center pin--you do not have to heat the brass center pin until the solder has flowed into it--and then heat only the very top--applying some final solder to seal the end of the center pin.

The center conductor is cut flush with the center pin end and any excess solder is filed away if necessary.

Finally the soldering iron is applied to the holes of the body after it has been screwed down tight on the center adaptor. You don't put solder on the iron or body, but in the hole if necessary

The final result shows that the solder is slightly concave in the body holes, and has flowed well between the body and the adaptor.

OK for those who have hung in so far, here are the differences from the "usual" technique. First we use the vise as a heat sink, the adaptor is clamped in the vise at almost every step, and this helps to avoid heat damage to the insulation of the cable.
Second, we do not pull the braid down over the adaptor, so it is soldered in the holds. This is not necessary, since the braid is soldered at the top of the adaptor, and gives a much better joint.
Third, we use a low heat iron, not a 140 watt gun. This also helps to avoid any damage to insulation.
Fourth, we avoid excess solder on the center pin and on the body of the PL259.

