Outdoor Photography Article

Wandering Sagebrush

Free Range Human
The November issue of Outdoor Photographer has a GREAT article on using Photoshop. It has 5 or 6 techniques to really bring out the highlights in your photographs. If I can get the upload working, I will post some before and after pictures.

Steve
 
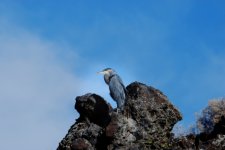
Here's the retouch through Photoshop and a resize in Photobucket. It isn't as crisp now that it is resized, but you can still see the difference...

HeronatPageSprings.sized.jpg

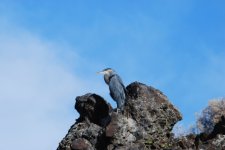
And here is the original that has been resized in Photobucket...

DSC_0036_1.sized.jpg

The retouched photo has a much deeper background that really makes the subject heron stand out.

Steve
 
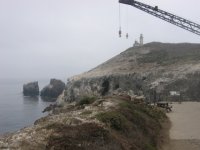
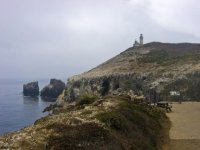
As a photo pro, I dabble in PhotoShop constantly, using it in one manner or another in my post processing routine. Here's an example of recovery of a nice shot made on a day that totally lacked contrast. Also. as I framed the shot in my viewfinder, I knew that the crane could easily be eliminated in PhotoShop.


Here's the original: IMG_3163.sized.jpg

And the finished product: 080905_G_6680_500.sized.jpg
 
Wow Mike, that's impressive. How did you eliminate the crane without showing? When I try to do something like that I end up with the object gone but the replacement sky usually looks very odd.
 
Must say that was impressive and I've seen examples of Wild Blue Jim doing amazingly creative things with photo's, but personally if its outdoors I prefer to capture the image as close as possible to the way my eyes view the scene, so I can later use the image to help relive that moment in time or share it with others. Use a very simple point and shoot camera and very few if any of the photos in our albums here have been changed at all except for the resizing. Of course I like trying to frame the scene at the time of the shot in the best possible way, but most of the time it seems to me the scene makes the photo more than the photographer. Its hard to go wrong with the right scene, but will readily admit some photographers either through learning, talent or just plain enough shots can consistently come up with photos that leave the rank amateurs like me a little envious and then there's the pros who can take pretty much any photo and through computor software create whatever they want out of it.

In many ways I yearn for a more simplier time untill that thought is intruded on by the simplier time would likely not include this computor that enables me to share and communicate with a lot wonderful folks here on this site.

Jay
 
I use to think using Photoshop or other editing programs was sort of cheating but after purchasing Photoshop and trying to learn to use it you've gotta be pretty darn creative to use the program. I wish I had more time or the discipline to learn to use it better. Here's a photo I altered slightly with photo shop. The original was pretty boring and blurry.

DSC_0048_0072.jpg
 
One of my favorite features of Photoshop is the healing brush. It is great at removing lens flare, dust, or small objects that you don't want in the picture. Also, if you are shooting with a DSLR or a camera that can accept filters, I highly recommend using a circular polarizer when on the water. You'll be amazed at the result.

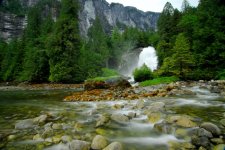
Here is one of my favorite pictures from the summer, straight from the camera except for resizing.
SAM_0898.jpg
 
Dauntless

Enjoyed the photo. Sure shows what scenery and the ability to capture the frame can do without after aids. Actually even though I'm not into it mostly due to a combination of what I stated previously and having to much to figure out already with the electronics on the boat and other new stuff that I feel must be learned, I do enjoy seeing what someone else can accomplish with or with out photoshop type aids. I guess really the photoshop type aids are just another step up from starting with a very limited inexpensive camera and working your way up through the high end and then adding filters different lenses ect to create the effect personally desired or in the case of a pro what will sell.

What is that photo resize to? The quick resizing I've used won't post with that size and clarity.

In your album is that you or someone you photographed in the Skookumchuck Rapids.

Jay
 
Jay,

It was resized to 800x535. Shot with a Nikon D200 and Tokina 12-24.

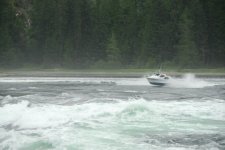
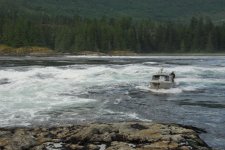
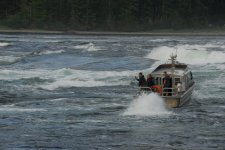
The pictures at Skookumchuck are of random kayakers that were there. I wouldn't be up for taking a kayak through that, but I was really impressed with the water taxi guys. One of them played around for about 20 minutes in the rapids, matching their speed, going backwards, jumping over waves...you name it. Who wants to try that in a C-Dory?!?
 
Well we tried something similar to that already in a c-dory at Ford Terror rapids (of course not by choice) and even though the boat was up to it, Jo-Lee and I have no present plans for a second round if we can avoid it. Glad you took the photos of the kayaks and wish you would have captured the water taxi as well.

Thanks for the resize info. That is a beautiful photo. Had to show it to Jo-Lee.

Jay
 
Jay,

Here are a few more photos of the water taxis in the rapids. If I recall correctly, the current was running around 14 knots when we were there...


SAM_0582.jpg


SAM_0641.jpg


SAM_0644.jpg
 
Thanks for making the taxi photo post. Love our c-dory, but they sure arn't made for that kinda water. What that boat makes look like a riffle I know from expereince really raised the pucker factor in a c-dory.

Jay
 
There are all kinds of creative things you can learn to do with PhotoShop, but I prefer to limit them to simply reproducing what I saw through the lens. The exanple of the lighthouse on Anacapa Island stretches that a bit by removing the crane, a scene ruining obstruction, but does not really create anything that wasn't there. Being able to enhance the contrast, permits you to reproduce what the eye saw, but the camera was unable to capture. By the way, removing the crane was done with the cloning tool.

In 20Dauntless' waterfall photo, note the heightened level of saturation in the green trees, and the coppery coloration on the rocks. I'm not sure if the camera is fixed with this setting, or a variable setting was used (as can be done with advanced SLRs), but it reflects a preference used by many landscape photographers to replicate digitally, the higher saturation of Fuji films. You have to be careful when increasing saturation levels to avoid making the colors seem unnatural. Used properly, it can really make a scene pop!
 
Mike

Nice explanation of how and why you can use PhotoShop as a Pro. Goes to show there are the lucky few who enjoy what they do and make a living at it too.

Jay
 
Sealife,

The picture was taken with a D200 at +1 saturation, the same as the pictures of the water taxi. It's true that digital can't reproduce the colors of Velvia, but the colors in the picture are very similar to what I actually saw. The green is a bit over saturated but the coppery color on the rocks is growth from when the tide is higher and actually looks very similar.
 
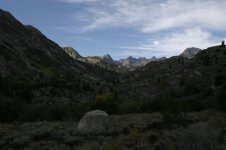
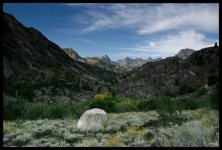
Original
IMG_2462.sized.jpg

After PhotoShop
Sabrina_basin.sized.jpg

Here's another example of how PhotoShop is used as the photographer's darkroom to replicate what film photographers dealt with in the field and darkroom with filters. Since the best light for landscapes comes at dawn and dusk, we have to deal with the high contrast between bright sky and deep shadows. With film cameras we used graduated netural density filters that restricted the amount of light on the top half of the filter, so we could expose for the shadows and get a total balanced exposure. Digital photographers know that we can usually get alot more detail out of shadow areas than overexposed highlights, so we expose for highlights (sky) and recover detail in the shadows in our darkroom (PhotoShop). This is done with a number of techniques that replicate the effect of the graduated filter.

Again, this is not doing anything phoney, but simply reproducing what the human brain can decern through our eyes, but what a camera cannot physically capture.
 
Retreiver,

Actually, what I said is that digital can reproduce the effects of Velvia, either within the camera by increasing saturation and/or contrast, or later in the PhotoShop "darkroom" using a variety of means. I even recall a photography magazine having an article devoted to how to achieve the "Velvia effect" using a PhotoShop action (a series of key strokes executed with one keystroke).

It is said that Ansel Adams' photos were 75% darkroom. We have just graduated to the computer darkroom.
 
Folks, I am impressed with the quality of the photos.

A couple of thoughts/questions...

1) Should we start a thread that gives stepwise techniques for working with Photoshop and perhaps other digital photography software?

2) Should we twist the arms of Mike and Bill to see if they would set up a photo contest where members could vote on the work?

Steve
 
Mike,

Digital results can come close to Velvia, but Velvia always seems to be more lifelike to me. The color rendition, while vivid, is more natural looking.

Among digital cameras I think Canon has the edge over Nikon in terms of color rendition, especially with the 5D. The Nikon colors sometimes seem "fake" with the saturation bumped up a bit and dull with the saturation at 0. This can often be adjusted in PP, but I often don't have the patience for lots of PP. Just out of curiosity, how would you edit that waterfall shot? It's always good to learn from pros.

On the subject of a photo contest, I think this is a great idea. Perhaps C-Dory would be interested in sponsoring one? I remember reading a post recently where they were asking for photos, perhaps a contest is a good way to get people interested. There could be different categories, interior, running, anchored, etc. The prizes wouldn't have to be big-hats, shirts...

Anyway, just an idea.
 
Back
Top