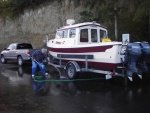
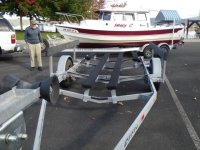
I just replaced my trailer's brakes which had been used in sea water conditions for about ten years. This was a drum brake system with a surge actuator. So I would like to describe my experiences and suggestions for a better system.
First lets talk about the top of the line system: electric over hydraulic actuator with stainless steel disk brakes. These will probably last nearly forever and with the EOH actuator gives much better braking control than surge drum brakes. They aren't cheap. You can buy all of the parts from Etrailer: Kodiak SS hub, disk, and caliper, and a Hydrostar EOH actuator for about $1,500 single axle, $2,200 dual.
I thought seriously about doing this but since I only plan to keep the boat and trailer another year I cheaped out and bought a pair of drum brake kits: backing plate, shoes and wheel cylinder for $109 and planned to install it myself.
It isn't that difficult a job. First remove the wheel and tire- you can leave it on but it is easier to separate the wheel from the drum. Then pull off the grease cover and pry out the cotter pin on the nut and unscrew. Then pull the drum out a little bit until you can grab the bearing and remove it. Then the drum will pull right off.
I was faced with a mess inside. In addition to the wheel cylinders leaking brake fluid like a sieve, the entire drum, brake shoes and springs was a pile of rust. The small springs that retain the shoes had corroded off and were rolling around loose inside the drum.
So I cleaned them up a bit and started unbolting the backing plate from the axle. I got three out of four off but was stymied by the last one. Its nut was so corroded I couldn't get a socket on it and the bolt head on the back side was up tight against the axle and I couldn't get a socket on it either.
The only solution was to finish pulling off the shoes and use an angle grinder to cut off the nut. But I didn't have power at the location I was working in or an angle grinder so I let the storage yard which is also a boat and trailer repair shop do it. They were quite reasonable: $330.
So they are back together now and the trailer is in its storage slot. It will probably take a few years for the paint to corrode off and rust to start inside. I will sell the boat and trailer before then and the new owner will have decent but not great trailer brakes.
If you do decide to DIY there is one final challenge after you unbolt the assembly from the axe, and bolt up the new one: bleeding. It isn't like a car brake where one person pumps the brake pedal and the other watches for bubbles and closes the bleed scew when it runs clear.
I read a couple of accounts and watched a few utube videos. What worked for me was to attach the two emergency chains together in front of the coupler then use a 4' long 2x4 to lever the coupler back a few inches at a time. I never finished this part and it really needs two people just like a car, but with the 2x4 trick it seemed fairly easy.
David


