Welcome to the C-Brats Photoshop Web-Seminar! Photoshop is the tool I worked with daily in the last decade of my career as a professional photographer. In the following, we will go step by step through the shooting and creation of the following image...
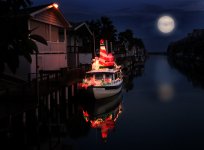
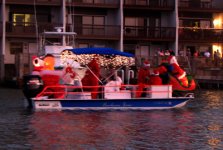
The first consideration for the image is its purpose. Mine was to show off Wild Blue’s Christmas decorations. Obviously, a lighting display is best shown at night. There are limitations to how much range (in f/stops and contrast) digital imaging can record. Negative film had more latitude; digital is more like transparancies. Trying to shoot small bright lights in the dark is more contrast than most digital can handle. For this shot, I used an amateur camera, a Canon S-3 (about $300).
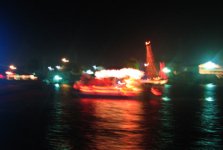
Timing is important. Many of you have heard about “the golden hour” that photographers like - that time around and just after sunset when the light is more diffused and has a warm, glowy quality to it. This image was shot on a mostly overcast day, just after sunset (no golden hour). It needed to be dark enough for the lights to show, but not so dark that everything else was black. The exposure was f/3.5 at 1/20th of a second (exposure index of 200). Note that the docklight on the roof is on - that will give just a bit of detail to the boat and help keep the contrast between the boat and the lights a bit less. I pointed the camera to the sky to get a meter reading that would be close to the lights on the boat, and held that exposure (by pressing the button half way) to recompose on the boat. Here is the rather non-descript result...
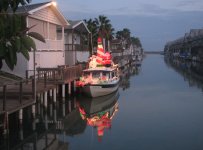
With that image in the camera, I downloaded it to my Mac laptop and opened it in Photoshop. (7.0 through CS3, the following should apply) Now, the “magic” begins.
The first step is to lower the levels far enough that the lights really show up...
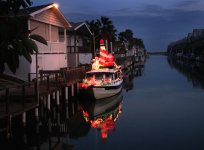
That is done in Image>Adjustments>Levels. Lower the darks and midrange, raise the highlights slightly (to keep the whites looking white). Go to the Burn tool, select a large diffused brush, set it to mid-range, 15% exposure and darken the sky (like cooking, this is “to taste”). Just like the “olden days” of burning in a portion of an image under an enlarger... only you can see exactly what you are getting.
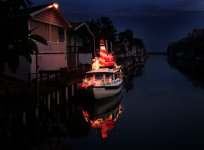
Next step is to turn day into night. Go to Layer>Duplicate Layer. This will give you an identical layer over the top of the first; consider that to be our “working” layer. Again go to Levels and make adjustments to make the overall image even darker. At this point, we are only interested in how the background looks (we are trying to create a “night” scene). Then go to the Tools palette and click on the Erase tool. Set the opacity for about 50%, use a soft edge brush, and erase only the boat and lights. What you now have will look like this...
For demonstration purposes only, the duplicate layer now looks like this...
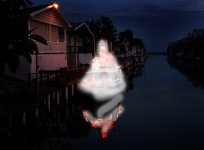
What we are doing is allowing the light value of the boat to be considerably brighter than the background. If all we did was darken everything, the whites in the boat would appear “muddy” and the boat would not stand out from the background.
The next step is to create some mood. My choice is to add a moon. Go to the Marquee tool (shapes) and select oval. Hold down the Shift Key to make it a circle. Add a new layer to put our “moon” on. Go to Select>feather and make a selection of 25 pixels (may vary depending on the size of your image); this will keep the moon from looking “cut out” by having a slightly diffused edge. Pick a slight yellow/gray color (pure white will look fake) and fill the circle with that color (Edit>Fill). To make it fit with the clouds in the sky, select the Airbrush tool, pick a color from the sky, and airbrush some diffused “clouds” over the moon. I positioned the moon where it is based on esthetics (dynamic positioning) and envisioning it as an apparent light source - the scene was actually lit by the diffused skylight, mostly non-directional, but coming from over the photographer’s right shoulder. The light direction from our “moon” should look believable. The three layers together will now look like this...
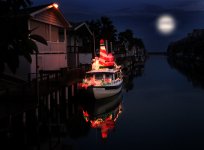
Looks better, but not quite what I had in mind for the moon... I felt the need to “crispen up” the moon a bit. With the same selection circle, add another layer and make another “moon” with less feathering (try 5 pixels). The four layers now will show the moon (with a firm edge) with a slight halo around it...
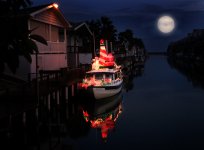
Better still, but if we are going to have a glowy moon, there needs to be a reflection in the water. Copy layer 3 (the diffused moon) and paste (this will create another layer). Move that to the position you want in the water, and use the Levels to make it a “weaker” image from the moon in the sky. Go to Edit>Transform>Flip Horizontal to make sure it looks like the “reversed reflection”. Select the airbrush tool (about 10% opacity), pick a shade slightly darker than the moon, and softly paint the water, leading back towards the moon. This layer now has the reflected moon and the airbrush water (only) on it. Go to Filter>Distort>Ocean Ripple, and add an effect to make it appear that the reflection is on slightly rippled water. Now it looks dramatic, but real.
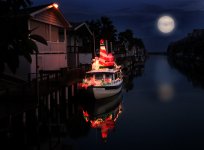
Since I promised Warren we’d move the stars and the moon for him, we need to add some stars. Add another layer, use the airbrush tool, select a very small diffused brush and make light “dots” in the sky area. For the fun of it, I made one of the stars “twinkle” (see in the upper right of the image) by dragging the airbrush up/down and across. Subtle, but it’s all about the image. Add some stars reflecting in the water (be sure the positioning makes sense). And, we are done.
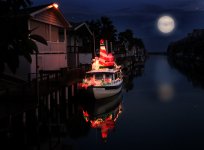
If you want, you can add other effects like color strokes or wording to make it into a Christmas Card...
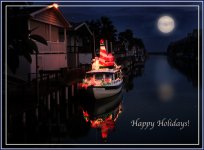
Keep in mind that none of this work should be done on the original image. After any work on the basic image, you should do a “Save As” and then continue to work on the new file. By keeping the work in layers, you can change your mind anywhere along the way and not have to start over - simply toss out a layer, and re-do it ‘till you’re happy. Save your work frequently.
Hope you enjoyed this look into the making of an image not possible by other means. We are WAY beyond the days of “what you see is what you get” in photography... with the tools available today, you are limited only by your imagination.
Enjoy!
Jim B.

