V berth storage

CDory23":f2awylfe said:
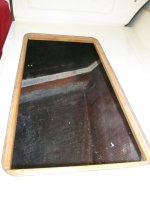
I'm resurrecting this thread because I started the project today of adding 3 hatches for storage in the V berth similar to what others have done.

It adds a lot of space, plus allows one to see all of the inside of the hull there. I have been happy with the mod on my boat.

CDory23":f2awylfe said:
I'm already started in this project and I"m not going to return the hatches, but I would have been just as happy if not happier putting a lip to support plywood which would lay flat instead. ... It would have been cheaper and also easier to move out of the way when you are digging in there for stuff. The hatch can't be moved obviously and has to be hinged up.

The last thing is the main reason I went with the hatches. But it seems that folks who went with hatches are also very happy with the mod (and it's likely easier/quicker). Not that it's hard to do the lips/hatch boards, but it's one of those fiddly epoxy things.

CDory23":f2awylfe said:
For the record my 2003 22 classic cruiser is FULL OF FOAM! It is being a real pain to remove. Currently I"m using a saw/knife to cut it and a few different types of crow bars. This is not an easy task. I haven't gotten terribly far in the foam removal process. If anybody knows an easy way to get it out please don't be shy.

My 22 was the same way (2002). Mine was HUGE BLOCKS of expanded polystyrene (the white bead stuff). I think at some point not too long after 2002 they went to injected/expanding foam, so not sure which you have. The blocks were a huge pain to remove, but the plus is that the hull is clean as a whistle as soon as you get them out. One thing that might help you is to know that (at least on my boat), the way they did it was apparently to lay down a grid of 2" masking tape, sticky side up, on the whole V-berth hull. Then they put the huge (did I say HUGE?) blocks on top of it (so they stuck to the tape). THEN they put the v-berth flat (top) on and tabbed it in place. I didn't know about the tape going in, and could not figure out WHY these blocks would not come up :amgry Not that it's a piece of cake anyway, but at least if you know what you are dealing with it's better. I used a 2' aluminum square (the longer leg) to "saw" the foam (I didn't have a long enough saw, and was away from the majority of my tools). There is more here, with gory photos, starting about 3/4 of the way down the page.

http://www.c-brats.com/viewtopic.php?t= ... &start=105
 
I put in hinged hatches, but found they work better as flat covers, sort of like the plywood ones described above. Having the flat covers allows you to get in the compartment without having to lift the mattress up high enough to hinge the hatch open. You just have to lift the mattress up a little, slide the hatch (cover) to the side and reach into the compartment. You only have to lift the mattress up high enough for the size of whatever you are taking out.

Having a light in each compartment is handy if you use them this way. Without the hatch open all the way it can be kind of dark in there.

I think there is a thread someone put up showing lights in the v-berth compartments. It's on my list of projects.
 
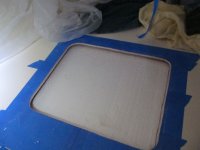
By the way, this is what the foam looked like in mine. It was massive blocks of expanded polystyrene (the white "bead" type; not the expanded/foamed in place type). You can see where I have started to saw a "line" around the perimeter - the blocks were much too large to come out otherwise.

6_Forward_opening_cut_out.jpg

These were a bear to remove, but the hull was completely clean (as soon as I finished chasing "beads" around with the vacuum).

8_Port_side_with_cleats_epoxied_in_place.jpg
 
This photo shows the formed, aluminum frame, that allowed the cover board to be flush with the top as well as gave it a more finished look.

147480830496.jpg
 
I should have noted that the picture is the interior of a Seaward 25 sailboat. I was in the midst of several improvements. The picture was to show the type of trim ring used on that boat for flush under cushion storage.
 
Those formed rings were the only type of "boughten" thing I considered, but I wasn't able to find them to purchase. I knew they must be common, but they didn't pop up in my Googling. Didn't have the Seaward clue at the time!

I'm probably happier with the outcome the way I did it (sailboat style, with flush/flat lids and an epoxied on wooden cleat underneath), but those rings would have been quick/easy. I like under-berth hatch covers that aren't hinged (like to be able to slide them to the side under cushion for grabbing smaller things), and most/all of the other pre-made hatch solutions involve hinged lids (that I've seen anyway).
 
By Googling Aluminum Boat Hatch Trim Ring, I found some sources, but not in the size I would prefer.

I may use your method.

BTW, how large of an opening can one make and not worry about loosing structural integrity of the surface into which it is cut?
 
By glueing in a wooden framework, you can make fairly good size openings. I would say that 15 x 25 would work--you might want to put a strong back (s) in the middle of the cut out Fiberglass, "hatch", for safe measure.

If any question about the "stiffness"--then just extend the glued in cleats under the bunk area for 6" to 8" beyond the opening.

We do storage with a hammock on each side, two sailboat "sheet bags" (keeps books, guns. flashlights and radios handy but out of site.) Overhead, we have criss crossed shock cords, and use Eagle "pack-it" cubes. The full size x 2 on each side, and one half size or underwear and sox. These have a mesh, so you can see what is in each cube, and don't have to sort thru a duffle. I can get all that I need for a month in this system/ Foul weather gear and sweats etc are rolled up with heavy rubber bands or shock cord to kept them in place in the hammock. Under the shock cords, I stick my glasses at night, flashlights, and a folding travel clock, so I can see the time, by pressing the light bar, The flashlight is very handy--no fumbling.

I personally would rather not dig round under the bunk--since we keep the bed made up. Alternately one could put canned or packaged food under the V Berth. We store what we cannot get under the galley in an action packer in the cockpit (doubles as a seat and easy step up out of the boat). The area under the forward dinette seat goes from my tools, spare parts, several sunbrella tarps, life jackets extra fire extinguisher, and other goodies. The area under the water tank has extra beach towels, Toilet paper and paper towels. The area under the helm seat has napkins, extra utensils, the induction stove, spare containers etc. Under the helm foot rest is safety gear--back up air horn, flares, firs said supplies etc.
 
Agreed on the epoxied cleats providing stiffness. I'd say mine is better now than it was before due to those. I did size the openings to allow for a possible future mini-bulkhead going across at around the area where the berth "wings" join the forward part (later boats [2009] had this, although I think it was more to make finished compartments that it was about any lack of them being a problem in earlier boats - the later boats came with three hatches under the berth).

Here is a link to where I photo-discuss the process of doing mine, and I have some tape measure shots. I still have the wooden patterns I used to make the cuts (just ran across them yesterday in fact), so if you would like to know the size for a reference point, I can measure them.

(I may have linked this earlier in the thread, if so sorry for the repeat.)

The V-berth project starts about 3/4 of the way down the linked page, then continues on the next page.

http://www.c-brats.com/viewtopic.php?t=19284&postdays=0&postorder=asc&start=105

I don't use this storage for things I'm going to get to often, but I have a number of bulky/lightish/seldom used things that I appreciate the space for. Examples would be extra sleeping bag, spare prop, spare portable stove (minus canisters), some spare line, a bag of window screens, extra rolls of paper towels, etc. These tended to cut down on the easily-accessible storage in the main cabin when I had them there before I made the v-berth storage.
 
My '08 came with no foam in the v-berth compartments and flush hatches to access them. For some reason the manufacturer put in a large hatch (~12x23") for the forward compartment and small hatches (~10x12") for the side compartments. I changed the side compartment hatches to larger ones.

The original hatches were screwed in, but not sealed. In the event of a casualty, they would have slowed the water intrusion, but not stopped it.

The flush hatches I have now are just laid in the openings. This makes it easier to access the compartment then if they are screwed down. You can just slide them to the side under the berth cushion rather than try to move the cushion so the hatch can be opened via the hinge.

There are some examples in the gallery of people who have cut the compartments opened and used the cut out piece as the hatch cover.
 
ssobol":1mrghl3y said:
The flush hatches I have now are just laid in the openings. This makes it easier to access the compartment then if they are screwed down. You can just slide them to the side under the berth cushion rather than try to move the cushion so the hatch can be opened via the hinge.

I like that feature too.

ssobol":1mrghl3y said:
There are some examples in the gallery of people who have cut the compartments opened and used the cut out piece as the hatch cover.

I did that, although it wasn't really my intention. I say that because on my boat it would be 3/8" ply to make flush hatch covers; and when I cut mine out I didn't have any of that on hand, nor did I have easy access to any. So I smoothed the edges of the cutout pieces, coated the edge core with epoxy/paint, and put them back in as the hatch lids. They look nice since they are (obviously) matching gelcoat. But, they're a bit heavier than need be, and the edges aren't quite as nice as what I would/will put on ply. This summer I bought some 3/8" marine ply (for the hatches and a few other things), so at some point I'll probably make replacement hatch covers with it.
 
Back
Top