SO WHAT DID YOU DO WITH OR ON YOUR C-DORY TODAY??

Applied first coats of insulating/acoustic paint to berth area storage compartments, under-seat compartments, and under-foot storage lockers. Put in new bilge pump and float switch. Primed cabin floor for new non-skid paint and cleaned out stern battery compartment and installed first pieces of a new three battery 290AH system.

Re-wiring...... two group 31 AGM batteries forward, one group 24 AGM starting battery, victron 600s monitor, forward and rear DC distribution, Yandina c100 combiner, 12-24v converter for accessory charging, AC connection with GFI and dual chargers for redundancy/capacity, prep for solar charging system.... Diagram only in my head so far and evolving
 
I'd be interested to hear more about the paint and your experience with it.

Speaking of the Victron BMV600S battery monitor (I have one on my boat too): I was looking for one to put in the RV and see they are just coming out with an new/improved 700S. I read up on it. Basically the same shape/look but with added features. It can be installed with the 600's shunt and gauge hole (so an easy upgrade)* Looks like it will be a touch more expensive, at around $178 (the 600 used to be around $150). However... I found the BMV600S on sale at Hamilton Marine for $106. Score! :thup I briefly considered waiting for the 700, but decided the 600 was now irresistible -- so I bought one (for the RV).

So, anyone who has been thinking about a battery monitor but was on the fence.... I can vouch for the fact that the Victron is a very easy install. The gauge itself uses a Cat 5 type cable so just snaps connected (you do have to wire the shunt with ring terminals).

Here is a link to the closeout at HM -- looks like they are still available as I post this.

http://store.hamiltonmarine.com/bro...monitor-bmv-600s-9-90-vdc-730865/4,42304.html

Sunbeam

*I can't remember all the details, but these were things such as scrollling phrases during the settings phase (vs. things like H1, H2, etc.), a SOC bar that can display while other functions are showing, Kw hours used, battery mid-point, and also a way to use software to monitor through a Victron program. So, nifty stuff, but.... decided that the 600 for around $100 would do me fine for the RV (have been very pleased with it on the boat).
 
Aurelia":lba9846k said:
Finally finished digging out foam from the berth area and glued in the mounting blocks I need for the new house batteries up there. Now I am ready to start applying the SC#1000 sound proofing/insulating paint all over the place. That foam job was the least fun I have had on a boat.

I have two cans of this paint. I haven't got 'round to applying it yet, so I'd like to hear about your experiences with it too.
 
ssobol":225f2u67 said:
The 602S (monitors second battery) is only $128.80. Got one!

Thanks for posting info on this deal.

Cool! Glad if it "tips" anyone into a battery monitor, as they are fantastic to have. Just a note for anyone else considering the 602: I believe it only monitors voltage on the second bank, so it's not a "true" two-bank monitor Not that there is anything wrong with the 602, as long as someone buying it does not expect it to act like two 600's would (i.e. same functions on second bank). I only wanted to monitor my house bank, so got the 600.
 
Now you got two tip's, LOL I just ordered one.

Bill Kelleher

Cool! Glad if it "tips" anyone into a battery monitor, as they are fantastic to have. Just a note for anyone else considering the 602: I believe it only monitors voltage on the second bank, so it's not a "true" two-bank monitor Not that there is anything wrong with the 602, as long as someone buying it does not expect it to act like two 600's would (i.e. same functions on second bank). I only wanted to monitor my house bank, so got the 600.[/quote]
 
Sweet. I did mean "tips" as in tips the balance if someone was teetering on whether or not to buy one, just in case anyone thought I was angling for money :lol: I'd been thinking I'd like one for the RV, but I don't "spoil" that like I do my boat, so I'd been waffling for awhile. Or maybe just not getting around to it. Either way, the nice price (plus Hamilton are good folks) did the trick. Interestingly, every place else that I noticed had it at the regular price still (and more expensive than it was a year ago, at that).
 
Here are some experiences we had with the SC1000 coating on our past boat. below text taken from thread linked at bottom

Two coats down and one to go. I have one gallon and it will be enough for three heavy coats on the side walls of the v-berth and the end wall where the anchor locker is located. That will give use plenty of untreated overhead panels to compare performance. The product is basic white and the thickest paint I have ever dealt with. I popped it open to stir it and realized there wasn't much point. It is some thick that it can really settle out. I would say it is like a Wendy's frosty that never melts if you are familiar with that treat. It does not drip at all and is very easy to apply with a brush. I am using a half inch for trim and a 2 1/2 inch for the walls and it goes fast and easy with each coat taking about 20 minutes. If it turns out to help significantly with condensation/noise, I will be buying another gallon for sure and do the rest of the v-berth not already covered with foam padding. We have grown quite fond of that foam.

http://www.c-brats.com/modules.php?set_ ... _photo.php

http://www.c-brats.com/modules.php?set_ ... _photo.php

It dries flat white with a brushed texture and looks quite good. You could always have any paint store tint it for you for another color. I do not plan on any topcoat at all and I think a gallon would likely do at least a couple of coats in your boat. I plan to test it out overnight this weekend and will post my results. Third and last coat goes on tonight!

Well, I got three heavy coats brushed on the sidewalls and anchor locker wall and did not quite finish up the gallon. I spent two nights in the boat during the last few days and the results are promising. I would say the most noticable difference is less noise with thermal insulation coming in second. It is noticably quieter up there but I wouldn't call it warmer. I wish I had one of those thermometer guns to verify but I can feel the difference in temp between the coated wall and uncoated wall with the back of my hand. Don't get me wrong, they are both still cold but the coating makes is slightly less so. The condensation is severely reduced but I would not say it's eliminated. I slept all zipped up with the canvas cover and hatch closed to make it worst case scenario and generated the standard condensation issue we are all familiar with. The treated walls were dry except way forward and near the uncoated ceiling it was somewhere between clammy and slightly wet. The wall adjacent to me was wet where uncoated and dry where coated so it really does make a difference! I still feel the need for some soft thermal insulation from those walls down low where a sleeper comes in contact with them and I will use a simple long panel section of removable foam for that (pics tonight).

So the moral is, yes it does work primarily for sound and second for thermal insulation but is still a long way from warm a fuzzy. I will buy a second gallon and do the rest of the v-berth but not the sections I already have covered in 1/8 inch foam. The foam IS warm and fuzzy and we loved it immediately as head padding so it stays.

The product goes so far at least with brushing that I will also add another coat to the walls for good measure. Spraying may allow for a thicker build and better overall results but I will leave that to someone else with a masking fetish to try.

80 bucks per shipped gallon (2 total for multiple coats in the berth) is worth it in my opinion and I am wondering how I will resist coating more of the boat. If Cindie takes a real notice to the difference, she will want to do the whole boat. Cold is Cold so we will see if the quieting adds enough motivation.


Followup on the SC #1000 coating. We ran the boat out in some rough water (sustained waves over 7ft) and for some high speed cruising and the difference in sound was big. With the coating on the walls of the berth only, Cindie really noticed while underway and she also noticed increased quietness when going to sleep. This coating really is an acoustic barrier first and thermal insulation second. We had the boat out overnight with the three of us running only the wallace for heat with just one window cracked (usually have two) and had some condensation on the coated surface. It was less than before but still there. The new foam pads against the walls were fantastic. The sound deadening qualities have Cindie wanting to coat the lower half of the remaining interior so that project is on the list. It really makes a difference.

read it all in this thread:

http://www.c-brats.com/viewtopic.php?t= ... &start=210[/i]
 
Just finished a couple of days of work.

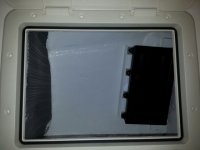
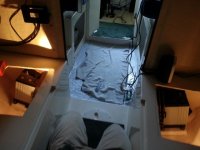
The grey on the left is a panel of closed cell foam to cover the flotation foam I left in place. The white interior is the first coating of SC1000 acoustic/insulating paint.

20140223_153758_resized.sized.jpg

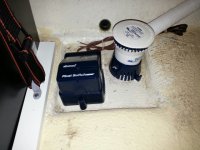
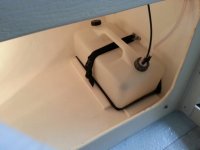
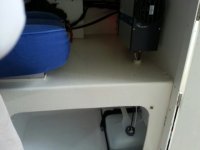
New pump and float switch mounted with 4200 but not wired yet. I bought two pumps but decided just to keep the second one as a spare (this model has a swappable motor) and carry a manual pump as well.

20140223_170259_resized.sized.jpg

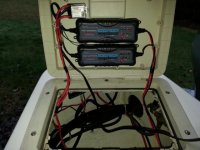
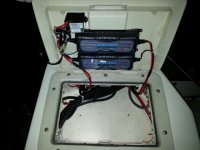
Got the twin chargers and combiner mounted with double-sided tape and epoxy putty to the underside of the hatch on the Stbd side. And the hatch does still close normally...

20140223_170342_resized.sized.jpg

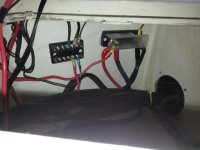
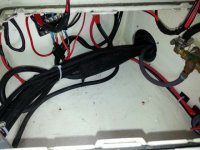
Also finished up the start battery connections and got started on the inside compartment connections but most of this is still in process. I need more wire and connectors to get further. Diagram now on scratch paper and still evolving.

20140223_165719_resized.sized.jpg
 
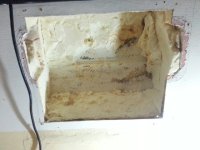
Cleaned up the the hole in the side of our cockpit
20140226_181758_resized.sized.jpg

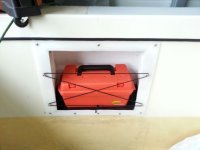
Better now
20140301_144608_resized.sized.jpg

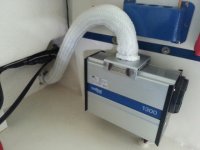
Installed a Wallas 1300 heater
20140301_114513_resized.sized.jpg
20140301_114345_resized.sized.jpg
20140301_102844_resized.sized.jpg
20140301_114527_resized.sized.jpg

Finished installing the house batteries. They are in trays bolted to blocks on the floor and strapped to the floor and wall in both directions.
20140228_173907_resized.sized.jpg

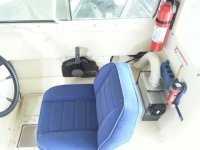
Also finished the wiring in back and installed the victron monitor in the dash.


I put in twin 4 amp smart chargers and a yandina dual sense combiner. They can be checked on with a simple flip of the hatch. We are also having a camperback made that will cover the rear hatches. One charger is connected to the house and one to the start battery and the combiner shares charging in both directions depending on which battery is ahead and protects the start battery from house loads. This means if one charger goes out the other will still charge both sets and the motor will also charge both sets of course.
20140301_193857_resized.sized.jpg
20140301_193910_resized.sized.jpg
 
Nice!

The Wallas 1300 or 1800 are still on my short list for a heater, so always interested when someone installs one.

I had thought about moving my house battery (which may turn into "batteries" when I have more means of re-charging) forward to get the weight off the starboard transom, but then wondered if the heavier cabling necessary would basically negate the weight savings. I didn't actually calculate it though, as at the time I just went with one battery and kept it in the lazarette as per original. Maybe I'll have to re-visit that idea and actually work out the specifics.
 
Gregg, That is really looking nice. Great photo write up.

Thanks for sharing. Looking forward to seeing you all on the water.

Harvey
SleepyC:moon
 
Patty here. Now that our wonderful boat, Daydream, is looking like new on the outside and under cover for the first time in 7 years, we are "detailing" the interior. Today we went through every storage nook and cranny, threw away much of what we have stored for years, and are going to take soap, water, and bleach to said nooks and crannies. Then we will methodically decide what goes back and how it goes back--are thinking bins and plastic bags (dumped a lot of cardboard receptacles that were damp and/or moldy). It's kind of theraputic and unburdening, much like cleaning out our home of 27 years to move to Birch Bay. Hmmm....which one of us will put the first ding in the restored Daydream???? (Maybe I will just let Pat do all the driving and docking until it happens--:>)
 
Drilled a bunch more holes in the boat. :lol:

To install radar, mount and Scotty plates and plugs.

Sneaked it in between tropical rain storms and polar votexs.

Finally a weekend with a dry warm day. 14 Celcius beautiful short sleeve weather :hot
 
I ran wiring and installed new terminal strip for new wires behind helm.
Adding a light over table and sink/stove and also one under the radio shelf.
Cleaned up wiring back at switch in starboard lazerette. Installed a Blue Sea System Dual Buss Plus.
Waiting on light fixtures this week from the Brown Truck and will finish off wiring with black split loom.
 
Cleaned, sorted, dumped, and removed and or repackaged. Getting rid of what I don't use, won't use or haven't used. Also getting ready for some shop time.

Most of the day on the boat, and the only water I was in was the rain. Enough already, we are over our allotment for March, by nearly double.

Harvey
SleepyC:moon


Friends_Cal_09_10_Oct.thumb.jpg
 
I have taken my plow anchor off the bow of my 16, it is much to difficult to work from the bow. I am launching & raising the anchor from the rear now, it is still is running thru the bow roller but I am using one of my bumpers as a buoy for the anchor. What that means is I can pull the anchor line in as a had in the past from behind the helm seat as I slowly go forward, when I reach the buoy I'm right over the anchor. As the very kind and knowledgeable Bob Austin suggested to us, I now have a pair of gloves to make the weight easy on my hands as well as avoid a cut or scrape that could be infected with all that bottom crap that you have to wipe off the anchor before bringing the anchor on board. I learned all this off of this sight. I repeated this about five times in one day until I got the hang of it.
I have two anchors, a Plow and a back up Danforth and on a muddy bottom the Danforth would not set, at least after 15 min of dragging in reverse it would not set. I dropped the Plow in and in 5 sec of reverse my boat was SET. So the Danforth may be going to the junk museum.
 
Still busy....

-Pulled off the anchor roller that was loose and resealed and remounted it
-Put the new Rocna anchor package together and marked it every 10ft for a total length of 180ft composed of 35ft of chain and the rest is braided nylon.
-Started wiring the shorepower components including GFI and three 200W heaters
-Built a custom table for the cockpit that rotates for use either in the cockpit or over the transom
-put in some mounts for mobile phones on the dash
-made an anchor locker cover out of TopGun material to separate the sleeping space from that wet chamber that I resealed and painted because it had a small leak..put it up with industrial velcro
-Measured, tested, and mounted a bow mount trolling motor that we just are not willing to live without (more details in separate post soon)
-built a base for extending the berth at the opening to fill that notch from the factory. Measures about 10x20 roughly and it will be covered with matching height foam and Sunbrella
-Removed and resealed transducer just to make myself feel better.
-Wired the float switch and new bilge pump to the helm switch for off or Auto modes.

Pics coming soon.

Greg
 
Back
Top